
Ultimate Guide – Learn How To Read Guitar Chord Diagrams
How To Read Guitar Chord Diagrams
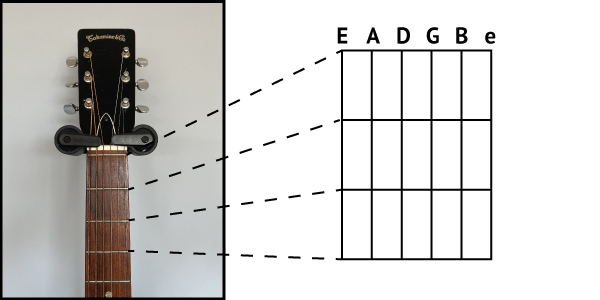
A chord diagram is just a picture of the fretboard with the guitar standing upright. The vertical lines represent the strings and the horizontal lines represent the frets. They are easy to read and can instantly show the guitarist how to play any chord with the correct fingering. They also show you which strings to strum and which to mute or avoid. Once you have mastered this essential skill, I recommend checking out my list of the best guitar chords to learn first.
Imagine your guitar is hanging on the wall and you’re looking at it… that’s EXACTLY what a chord diagram shows us!
In this lesson, I want to show you how it relates to the guitar, where to place your fingers, which fingers to use, how to name the symbol, and a few other things that you’ll need to know (barre chord diagrams and playing further up the fretboard).
It All Starts With a Blank Fret Diagram
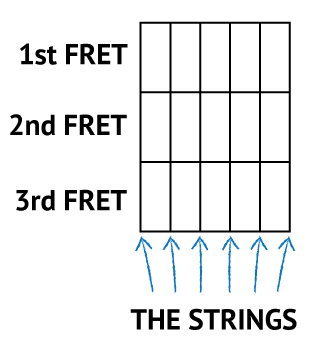
Step 1
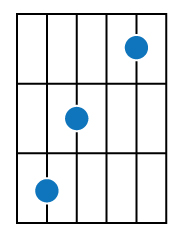
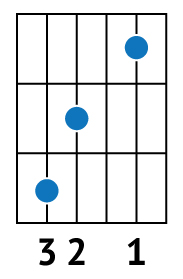
The circles show you where to place your fingers
Step 2
The numbers underneath, show which finger to use for the circle on that particular string
Your fingers are numbered like this (your thumb is on the back of the neck, so it doesn’t get a number)
- INDEX (POINTER / 1st FINGER)
- MIDDLE
- RING
- PINKY
In the above example:
- Ring finger goes on the A string, 3rd fret
- Middle finger goes on the D string, 2nd fret
- Index finger goes on the B string, 1st fret
Step 3
The X’s at the top mean “don’t play this string, or mute it”
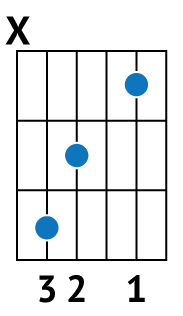
In this example, we are NOT playing the thickest string (low E) – we will avoid strumming it, or mute it by lightly touching it with another finger/thumb.
Step 4
The O’s at the top mean “please include this string, even though we’re not pressing any frets on it”
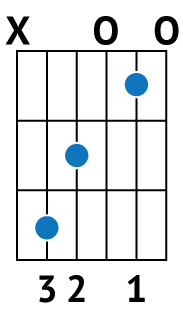
With this shape, we are making sure to play the G string and the high E string, as indicated by the “o” above each string.
Step 5 – Add A Title
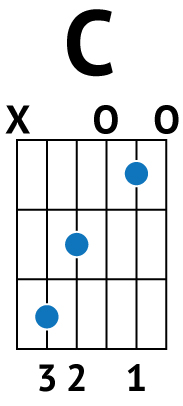
C Major Chord Diagram
Going Further Up The Neck
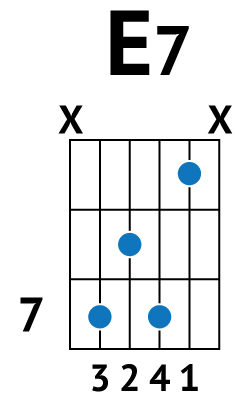
For certain chord shapes (like barre chords, or Jimi Hendrix’s favorite E7#9 chord) we need to go further up the neck. Indicating this on a chord symbol is very simple.
In this example, the “7” to the left of the chord symbol tells us that our diagram is further up the fretboard.
- Our ring finger is playing the 7th fret of the A string
- Our middle finger is playing the 6th fret of the D string
- Our pinky finger is playing the 7th fret of the G string
- Our index finger is playing the 5th fret of the B string
- The low E string and high E string are both muted