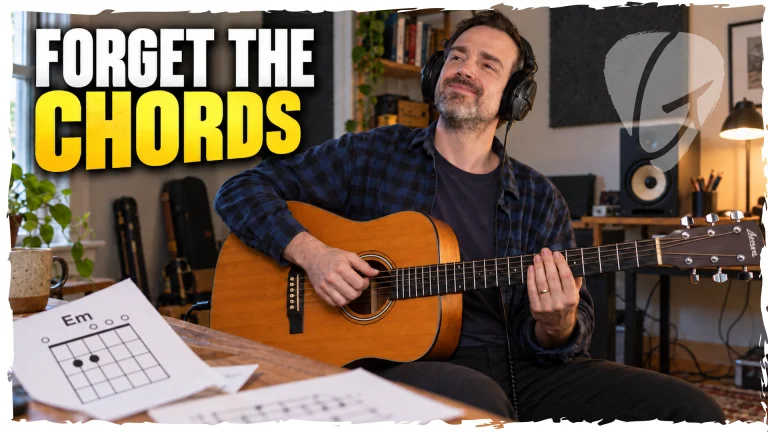
6 BEAUTIFUL 2-Finger Guitar Chords for Beginners
I want to show you some of my favorite, most beautiful chords and voicings on guitar.
7 Easy Two-Finger Guitar Chords That Sound Beautiful
Basic open chords are incredibly useful, but playing the same familiar shapes can eventually leave your guitar playing—and your songwriting—feeling a little predictable.
The good news is that you do not need difficult barre chords or complicated finger stretches to find new sounds.
In this lesson, you will learn seven beautiful guitar chords that require only two fretting fingers each. These shapes work on both acoustic and electric guitar, and you can use them for:
- Creating original chord progressions
- Refreshing familiar songs
- Songwriting
- Improvised jams
- Fingerpicking
- Developing a more modern guitar sound
The shapes themselves are simple. The real magic comes from experimenting with how you play them.
How to Make Simple Chords Sound More Musical
Before learning the individual shapes, remember that a chord is only part of the sound.
You can play the same chord in several different ways:
- Strum the entire chord.
- Pick through the strings individually.
- Combine single notes with strumming.
- Fingerpick the chord.
- Change the rhythm.
- Emphasize different strings.
This means that even a very simple two-finger shape can produce several completely different musical ideas.
Start by learning each shape accurately. Once your fretting hand feels comfortable, shift your attention toward rhythm, dynamics, and expression.
Chord 1: A Major 7
The first shape is an open A major 7 chord.
Place your fingers on:
- Sixth fret of the D string
- Sixth fret of the G string
Let the remaining appropriate strings ring open.
You can use your middle and ring fingers for this shape. This fingering makes the transition into the next chord especially comfortable.
A major 7 has a warm, dreamy quality that immediately sounds different from a standard A major chord. It is a useful shape for mellow progressions, songwriting, and relaxed jams.
Begin by strumming the chord slowly. Make sure every intended string rings clearly without buzzing.
Chord 2: C Major 7
For the second shape, slide your middle finger from the sixth fret down to the second fret of the D string.
Then place your ring finger on the third fret of the A string, as you would when forming a regular C chord.
You are essentially playing a C chord without using your first finger.
Strum from the A string downward.
This produces an open C major 7 sound that pairs beautifully with the previous A major 7 shape.
Try moving slowly between the two:
A major 7 – C major 7
At first, strum each chord once and concentrate on making a clean transition. Once that feels easy, begin experimenting with different rhythms.

Get the Worksheet That Goes With This Lesson!
All-Access Members can download it instantly and follow along step-by-step.
Try Arpeggiating the Chords
Instead of strumming every note at once, try picking through the strings individually.
This technique is called arpeggiating. An arpeggio is created when the notes of a chord are sounded individually in ascending or descending order rather than all at once. You can read more about the concept on Wikipedia’s arpeggio page. (Wikipedia)
For the A major 7 and C major 7 shapes, start on the A string and pick through the remaining strings one at a time.
Keep your picking hand relaxed and allow each note to ring into the next.
You can also combine the two approaches:
- Pick several individual strings.
- Finish with a gentle strum.
- Change chords.
- Repeat the same pattern.
This can make a simple two-chord progression sound much more complete.
Can You Fingerpick These Chords?
Yes. The same chord shapes work very well for fingerpicking.
The musical idea is similar to arpeggiating with a pick, except you use the fingers of your picking hand to play the individual strings.
You do not need an advanced fingerstyle pattern. Begin by assigning your thumb to the lower strings and using your fingers for the higher strings.
Play slowly and aim for an even volume from one note to the next.
Chord 3: E Minor Add 9
The next shape is E minor add 9, sometimes written as Em(add9).
Start with the open low E string. Then fret:
- Second fret of the A string
- Fourth fret of the D string
Allow the remaining strings to ring open.
The note on the fourth fret adds the colourful “9” sound to an ordinary E minor chord.
You can fret that note with your ring finger, but using your pinky may feel more comfortable for your wrist. Try both fingerings and choose the one that allows your hand to remain relaxed.
Strum all six strings.
This chord has an open, spacious sound that works especially well on acoustic guitar.
Chord 4: D6
The next shape is a D6 chord.
Think of it as a regular D chord with the ring finger removed.
Play:
- Open D string
- Second fret of the G string
- Open B string
- Second fret of the high E string
Strum only the highest four strings.
You will need to arch your fretting fingers so the open strings can ring clearly.
Try moving between:
E minor add 9 – D6
These chords work well as a pair because both use open strings and have a light, airy quality.
A Simple Picking Pattern for Em(add9) and D6
You can create a musical pattern without learning anything complicated.
On the E minor add 9 chord:
- Pick the lowest three strings individually.
- Count them evenly.
- Finish with a small strum.
When you move to D6:
- Begin on the open D string.
- Pick through several higher strings.
- Finish with another gentle strum.
The exact string order is not as important as keeping the rhythm consistent.
Experiment until you find a pattern that sounds good to you.
Chord 5: C Major 13
From the D6 shape, leave your first finger where it is and place your middle finger on the third fret of the A string.
This creates a colourful chord that can be interpreted in more than one way. One useful name for it is C major 13, although it may also be understood as a form of A minor 11 over C.
Do not worry too much about memorizing the technical name. Focus on recognizing the shape and its sound.
This chord contains several closely grouped notes, giving it a modern, slightly neo-soul-inspired quality.
The transition from D6 is simple because your first finger remains in place while the rest of the shape pivots around it.
Chord 6: A Sus2
The next shape is A sus2.
Place your fingers on:
- Second fret of the D string
- Second fret of the G string
Allow the other appropriate strings to ring open.
This may already be familiar. For some guitarists, it is one of the first chord shapes they learn.
It pairs especially well with the A major 7 shape from the beginning of the lesson. The two chords are related and have a similar open quality, but they create different colours.
Try alternating between:
A major 7 – A sus2
Listen carefully to how the mood changes even though both chords are based around A.
Chord 7: E Major
The final chord is a familiar open E major.
Unlike the other shapes, this is a standard campfire chord. Including it demonstrates how easily these colourful two-finger shapes can be combined with ordinary open chords.
You do not need to abandon the chords you already know. Often, the most musical approach is to place one or two unusual shapes alongside familiar ones.
That contrast makes the colourful chords stand out.
Practise the Chords in Pairs
Instead of trying to memorize every shape at once, practise them in small groups.
Try these combinations:
A major 7 – C major 7
E minor add 9 – D6
C major 13 – A sus2 – E major
Strum each chord once and concentrate on the transition.
Keep your fretting-hand fingers close to the strings and move only as much as necessary. The goal is to make each change feel effortless.
Once the pairs feel comfortable, connect them into a longer progression.
A Full Seven-Chord Progression
Try playing the chords in the order they were introduced:
A major 7 – C major 7 – E minor add 9 – D6 – C major 13 – A sus2 – E major
Begin by strumming each chord once.
Do not worry about using an elaborate pattern. Give yourself enough time to form each new shape accurately.
When you can play through the progression without stopping, add a steady rhythm.
You might play:
- Four gentle downstrokes per chord
- One strum per chord
- A down-down-up pattern
- Individual ascending notes
- A combination of picking and strumming
There is no single correct way to play the progression.
Pick Through the Chords
One of the easiest ways to make the progression sound more sophisticated is to pick through each chord from the lowest available string toward the highest.
For each shape:
- Identify the lowest string you are supposed to play.
- Pick upward through the chord.
- Allow the notes to overlap and ring.
- Change to the next shape.
- Repeat.
This creates an ascending arpeggio across each chord.
You can use the same picking order for every shape or vary it as you move through the progression.
Mix the Shapes With Basic Open Chords
You do not need to use all seven shapes in one song.
In fact, using only one or two of them may produce a more natural result.
Try combining a colourful chord with familiar shapes such as:
- G major
- C major
- D major
- E minor
- A minor
- E major
For example, you might create a progression containing three ordinary open chords and one major 7 or suspended chord.
That one unusual shape can give the entire progression a fresh identity.
Use the Chords for Songwriting
These shapes are particularly useful when you want to write something but feel uninspired by your usual chords.
Choose two shapes and alternate between them. Then experiment with:
- Changing how long each chord lasts
- Strumming softly or loudly
- Adding a third familiar chord
- Picking individual strings
- Humming a melody over the progression
- Recording the progression with a looping pedal
Do not feel pressured to understand every theoretical detail before using the chords.
Let your ear guide you. When two shapes sound good together, you have the beginning of a musical idea.
Try Creating a Loop
A looping pedal is an excellent way to experiment with these chords, but it is not required.
Choose a short progression, play it repeatedly, and keep the rhythm consistent.
Once the loop is established, you can:
- Add a melody
- Improvise over it
- Layer another picking pattern
- Experiment with dynamics
- Practise keeping time
Without a pedal, you can achieve something similar by recording the progression on your phone or computer and playing along with the recording.
How to Practise These Chords
Follow this sequence rather than trying to do everything immediately.
Step 1: Learn the shapes
Form each chord individually and make sure the intended strings ring clearly.
Step 2: Practise in pairs
Work on two neighbouring shapes at a time until the transition feels natural.
Step 3: Play the full progression
Strum each chord once without stopping.
Step 4: Add a simple rhythm
Use steady downstrokes before attempting a more involved pattern.
Step 5: Arpeggiate the chords
Pick through the individual notes with a pick.
Step 6: Try fingerpicking
Use your thumb and fingers to explore the strings individually.
Step 7: Create your own progression
Choose only the shapes you like and combine them with familiar chords.
The chord hand should eventually feel effortless. When you no longer need to concentrate on forming the shapes, you can devote more attention to rhythm and expression.
Simple Shapes Can Create Beautiful Music
Interesting guitar playing does not always require difficult technique.
These seven chords demonstrate how two-finger shapes, open strings, and a little rhythmic creativity can produce rich and expressive sounds.
Learn the shapes slowly, make the transitions comfortable, and then explore them through strumming, arpeggiating, and fingerpicking.
Most importantly, use them to create something of your own.